Good morning and happy birthday leap year babies!!!
Well today I have decided to start a "long term" project and show you some ideas. Well actually it's TWO long term projects. I was inspired last night over dinner with my fiance's family.
What do you need to do to start collecting for these two projects??? DRINK WINE!! HA! I'm going to start collecting the cork's to fill up vases and the wine bottles will be collected to make a pretty bottle tree for our garden. Anyone else getting their garden ready for Spring???
Here are a few links I have been researching for these projects with of course follow me on Pinterest for pictures of great ideas. :-).
This link is just for the "tree" part of a bottle tree. This would be the hardest piece of your bottle tree to DIY because you would need a welder to do it at home. So if you don't have a welding tool in your garage you might consider purchasing this part.
http://www.hopfrogmarket.com/store.php?seller=Testride&pd=2868444
Now this website you can even purchase the actual bottles colored if you want too. AND you can purchase gift certificates. Maybe your MIL would love a bottle tree in her yard?? I know mine does!
http://www.bottletree.com/?gclid=CM-B-umpw64CFcdeTAodvD5cdA
OK now here is a BEAUTIFUL version of a bottle tree LOVE IT! Thank you Pinterest!
http://pinterest.com/pin/58124651410241374/
So I'm having a hard time finding an "good" tutorial on how to make a bottle tree. But I'm pretty sure its self explanatory. You need some metal rods some tools to cut them to your preferred size and a welding tool to weld them together LOL!
http://www.ehow.com/how_5313656_make-lit-bottle-tree.html
This is a DIY version
http://www.lightweightmiata.com/projects/winetree/
OK now as your collecting all of your wine bottles KEEP the corks too! Here are some awesome ideas for "Cork" decor.
http://pinterest.com/pin/164170348885999050/
This one says it has corks....but it looks like it has buttons in to me ;-)
http://pinterest.com/pin/128282289355374121/
And here are a few other "cork" decor ideas you might like
A wreath
http://pinterest.com/search/?q=cork
"Cork" cork board!
http://pinterest.com/pin/162974080234981601/
http://pinterest.com/pin/189080884324914483/
Cork Frame (SUPER CUTE)
http://pinterest.com/pin/188095721906381223/
Happy wine drinking and collecting! I'll show you my creations as soon as I have drank my fill of wine to have enough for a bottle tree and a cork filled vase!
XOXO Stay tuned for DIY bridesmaids gifts

Wednesday, February 29, 2012
Monday, February 27, 2012
Fabric French Memo Board
OK I know you have been waiting to see how to make this rockin fabric memo board! So let's get STARTED!
Supplies:
Bulletin Board
Fabric (enough to cover your bulletin board)
Quilting Batting
Upholstery tacks
Ribbon
Scissors
Staple gun
Staples
Hammer
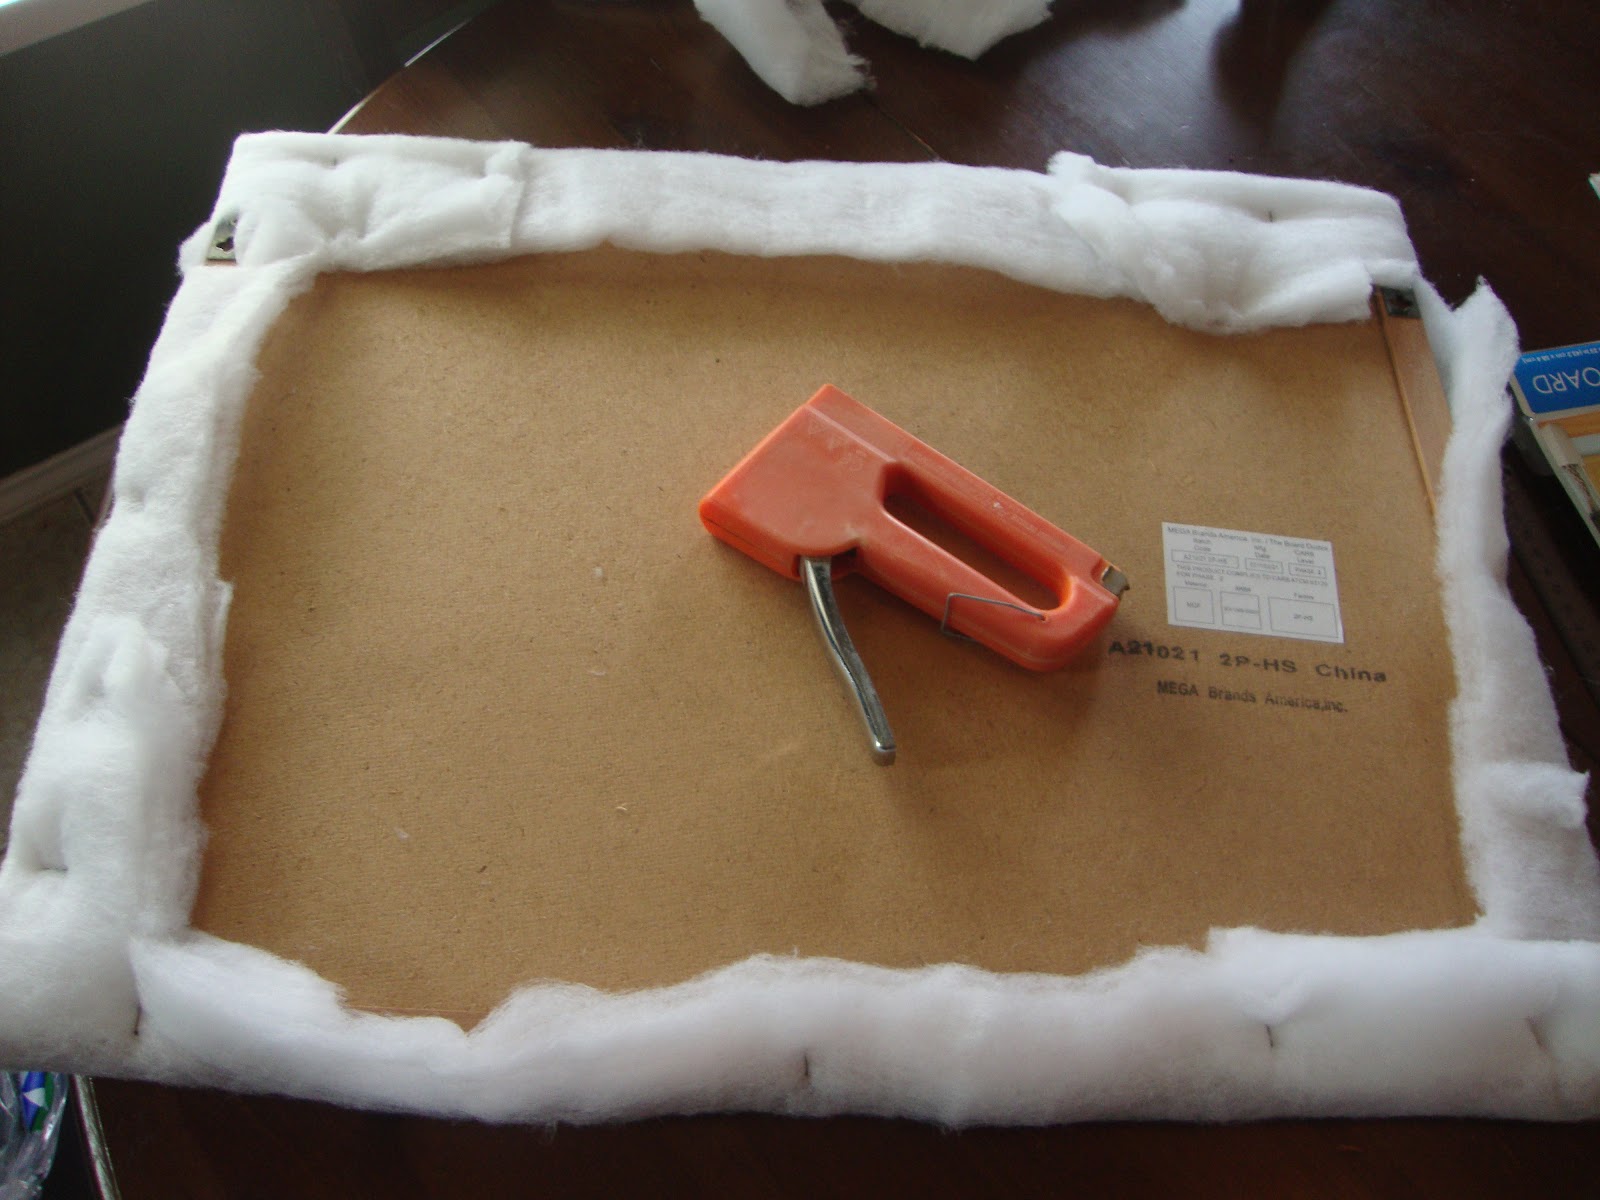
1st your going to lay out your batting. Now place your bulletin board with the back facing down. Fold your batting over the edges and start stapling it down to the wooden frame. After your done cut the batting around the frame edges. Don't worry about making the back puurrty right this moment. The last photo will show you what it should look like when you flip it back over. If your like me safe the batting you cut off for another project ;-). Maybe to stuff some doll pillows???


Now pick your board up and lay out your fabric. The fabric should face down. Lay your board down on the fabric also facing down. Start folding your fabric over the edges like you did with the batting and cut off the excess. Remember to make your edges where you are folding nice and pretty.
I made extra slits where my bulletin board already had hangers in it so it would be easier for me to hang. If your wondering where I got my rockin fabric I got it from Jo-Ann's of course ;-). It's on sale right now, they consider it Valentine's print.


OK now you will need to pick your ribbon of choice and your upholstery tacks and a hammer. Or you can use buttons like we did with the canvas, your choice. If you use buttons get your hot glue gun out and heat it up while you pick out your ribbon. Remember to heat seal your ribbon ends.
I chose two colors of pink....my first choice ran out half way through HA! turned out perfect though!
No start from one corner, staple the ribbon to the back and pull it to the opposite end, staple that end down then cut your ribbon and heat seal. Do this to the other two corners. Then re do the process on the other side to over lap them. After you are done if you are using upholstery tacks hammer them into the 5 points like I did below.


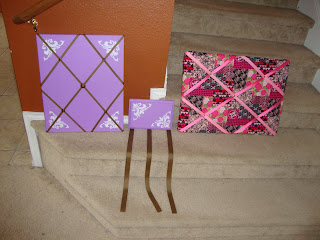
Now you know how I made these three beautiful creations <3

So go hang your beautiful creation and add some pictures to your memo boards! We hung our fabric board next all the Justin Bieber posters ;-)

Supplies:
Bulletin Board
Fabric (enough to cover your bulletin board)
Quilting Batting
Upholstery tacks
Ribbon
Scissors
Staple gun
Staples
Hammer
1st your going to lay out your batting. Now place your bulletin board with the back facing down. Fold your batting over the edges and start stapling it down to the wooden frame. After your done cut the batting around the frame edges. Don't worry about making the back puurrty right this moment. The last photo will show you what it should look like when you flip it back over. If your like me safe the batting you cut off for another project ;-). Maybe to stuff some doll pillows???


Now pick your board up and lay out your fabric. The fabric should face down. Lay your board down on the fabric also facing down. Start folding your fabric over the edges like you did with the batting and cut off the excess. Remember to make your edges where you are folding nice and pretty.
I made extra slits where my bulletin board already had hangers in it so it would be easier for me to hang. If your wondering where I got my rockin fabric I got it from Jo-Ann's of course ;-). It's on sale right now, they consider it Valentine's print.


OK now you will need to pick your ribbon of choice and your upholstery tacks and a hammer. Or you can use buttons like we did with the canvas, your choice. If you use buttons get your hot glue gun out and heat it up while you pick out your ribbon. Remember to heat seal your ribbon ends.
I chose two colors of pink....my first choice ran out half way through HA! turned out perfect though!
No start from one corner, staple the ribbon to the back and pull it to the opposite end, staple that end down then cut your ribbon and heat seal. Do this to the other two corners. Then re do the process on the other side to over lap them. After you are done if you are using upholstery tacks hammer them into the 5 points like I did below.


Now you know how I made these three beautiful creations <3

So go hang your beautiful creation and add some pictures to your memo boards! We hung our fabric board next all the Justin Bieber posters ;-)

French Memo Board on a painted Canvas
Hi all! I'm going to walk you through how I make a memo board on a canvas.
Supplies:
Canvas- Size of your choice. At Hobby Lobby they have them in packs of two. I got two for $8 :-).
Paint
Ribbon
Buttons
Hot Glue gun
Staple gun & staples
Scissors
Lighter (to heat seal your ribbon)
Find a good painting spot and put some news paper down. Then get ready to paint your canvas. For this particular one I was making it for a special friend as a baby shower present. I went to Home Depot and got them to color match the paint she used for her walls.
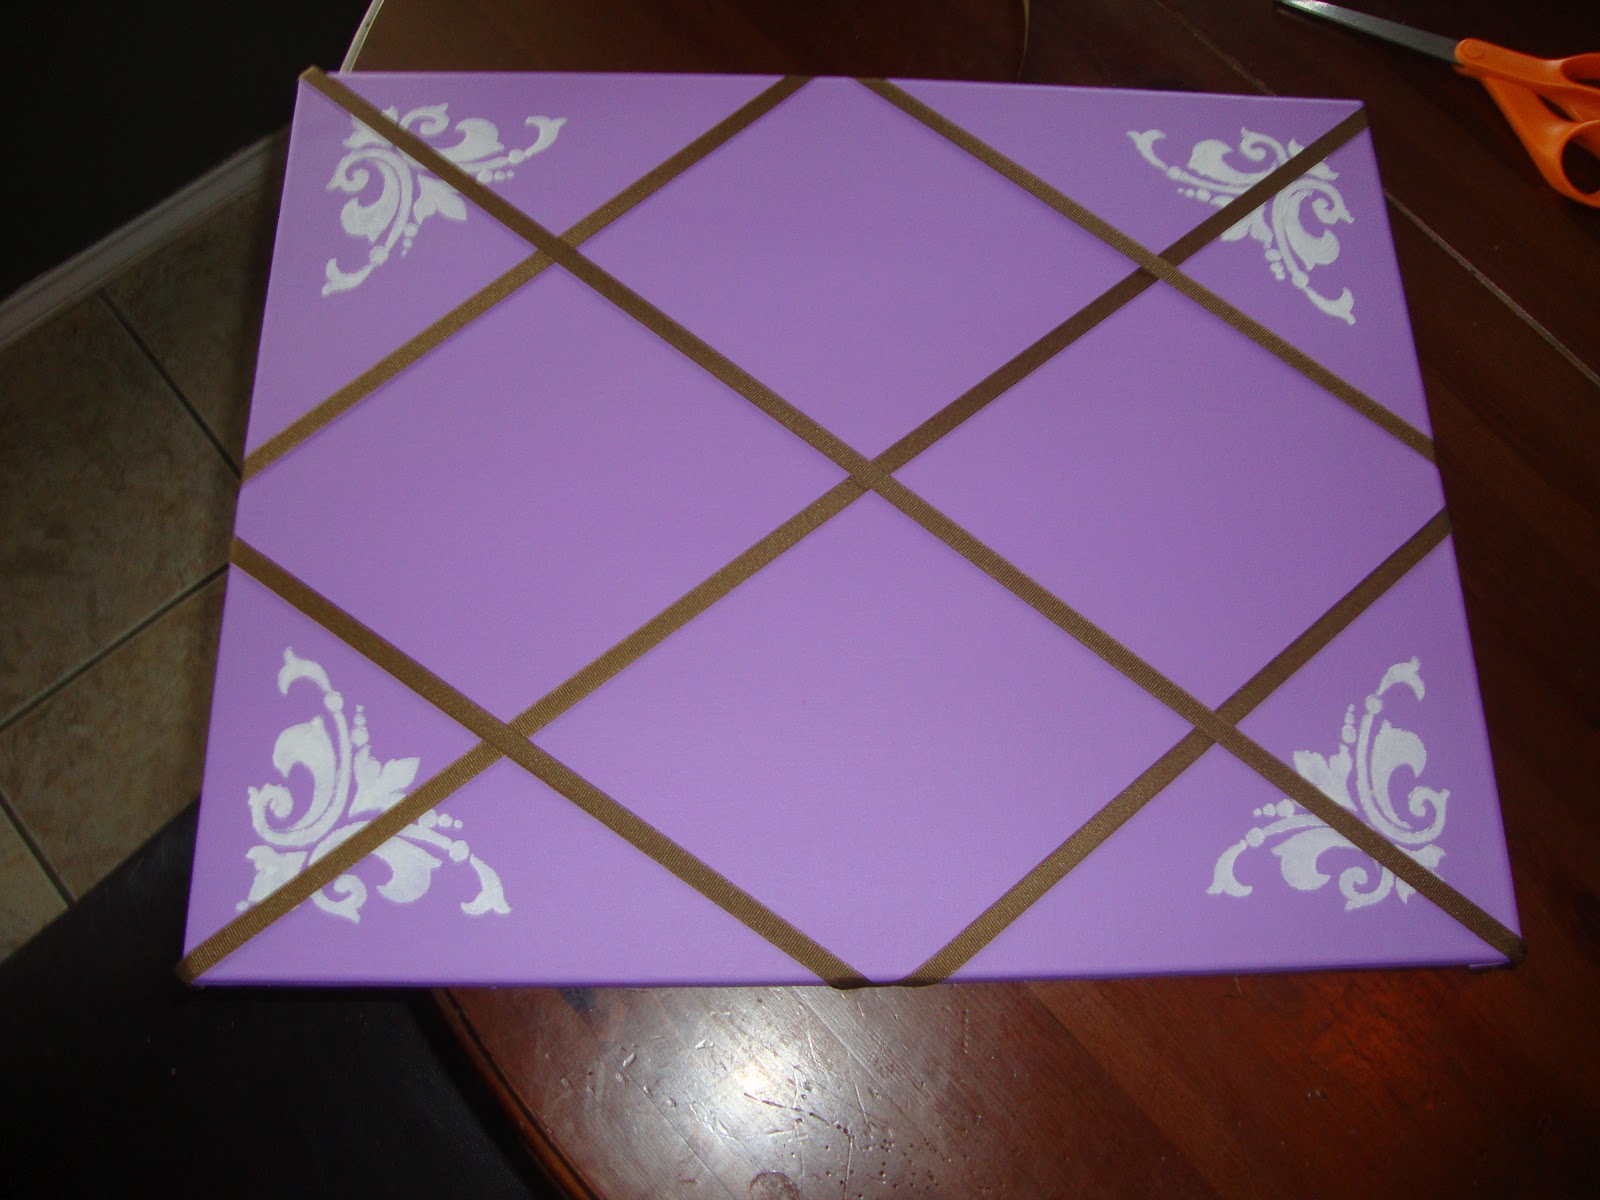
I painted the canvas Plum Burst. Then I chose to paint a stencil on the canvas in the corners. I got this Martha Stuart Stencil with three designs on it for $2 at Home Depot.
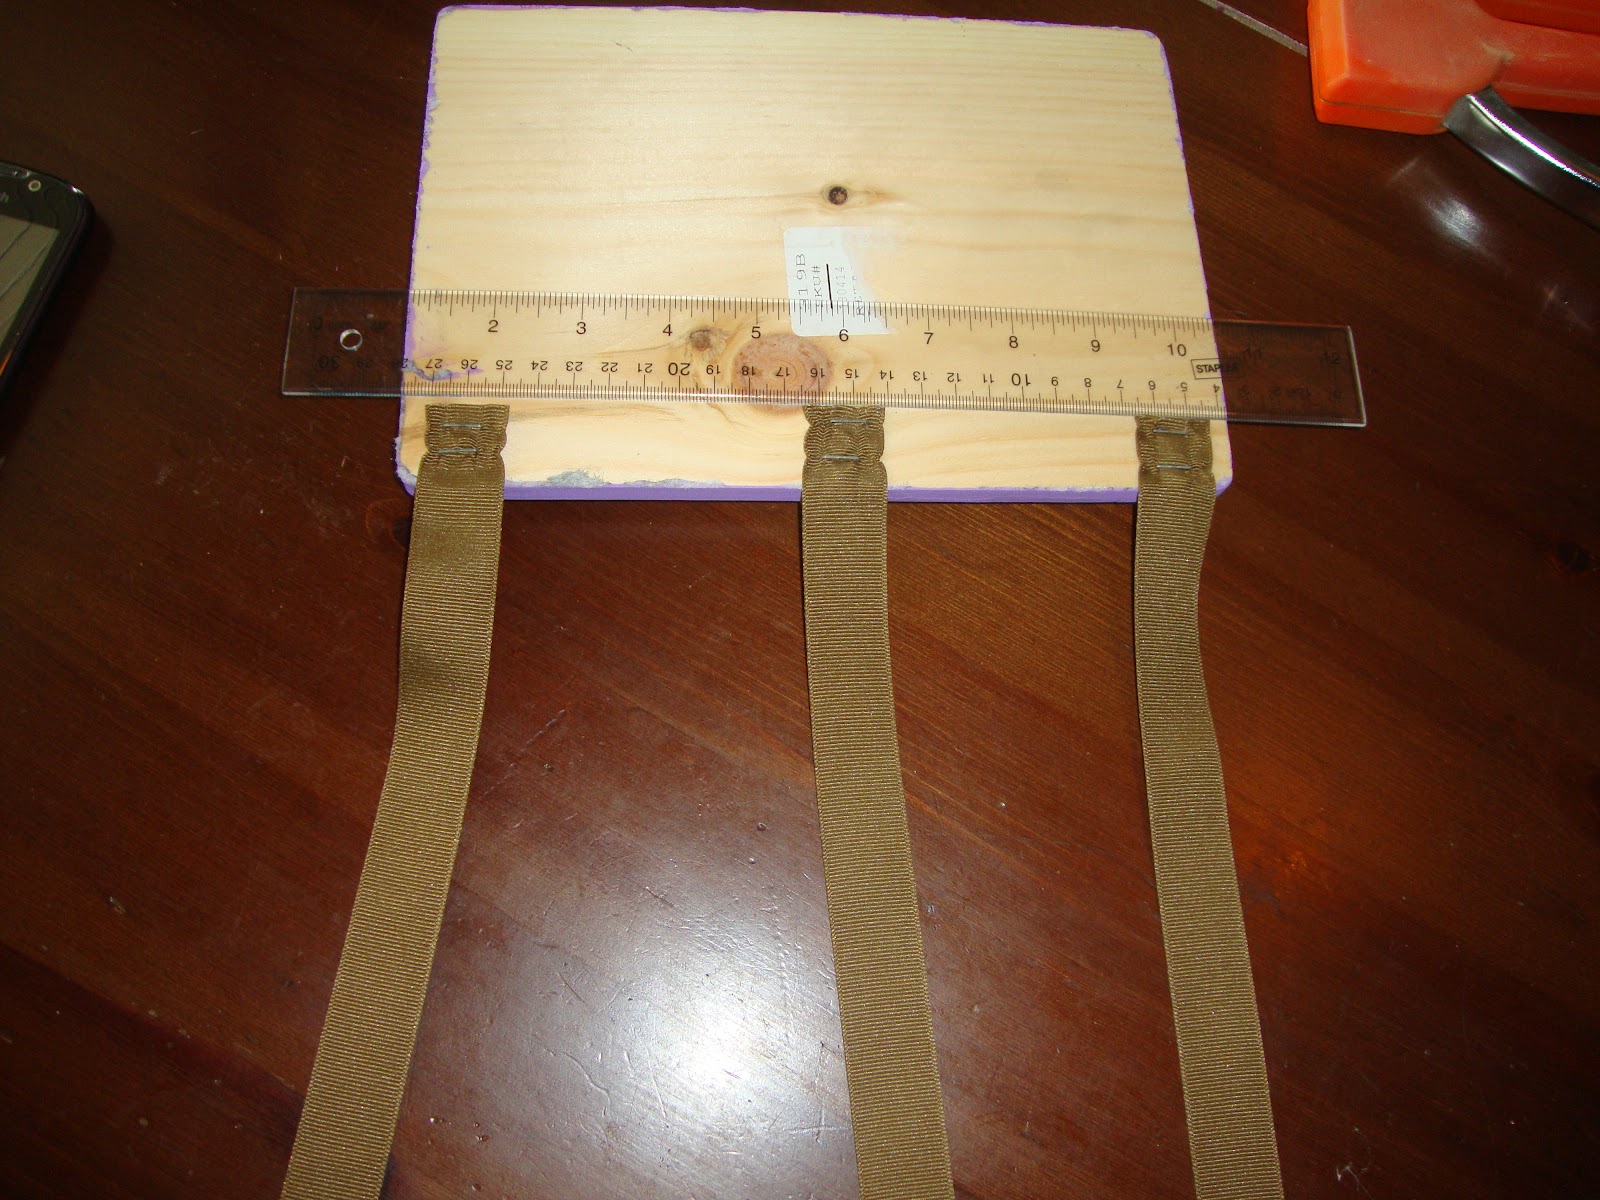
I also made a matching bow hanger. I had a wooden plaque, I painted it Plum burst as well then I stenciled it.
See how pretty....


Now after the canvas and plaque are dry you need to add the ribbons. I chose brown. For the canvas you will start with one going from one point to the other. Then put two on either side. Now do the same to the other side so they over lap. This is where your staple gun comes in. You will be stapling the ribbon to the backside of the canvas ON the frame. I used 3/8 inch ribbon for the french memo board.
For the bow hanger I chose to cut the strips of ribbon. Staple them evenly apart on the back side of your plaque. I used 7/8 inch ribbon for the bow hanger.
Remember to heat seal the ends of your ribbons :-)


Now we are done with the bow hanger. You can add hangers to the back. We still need to finish your beautiful memo board!
Get your glue gun and pick 5 buttons of your choice. I chose different sizes of brown ones. Hot glue these to the ribbon in the 5 cross points seen below.


Here is the Painted Memo board and the bow hanger. Next I will show you how to make a FABRIC memo board! TOO TOO CUTE!!!
Supplies:
Canvas- Size of your choice. At Hobby Lobby they have them in packs of two. I got two for $8 :-).
Paint
Ribbon
Buttons
Hot Glue gun
Staple gun & staples
Scissors
Lighter (to heat seal your ribbon)
Find a good painting spot and put some news paper down. Then get ready to paint your canvas. For this particular one I was making it for a special friend as a baby shower present. I went to Home Depot and got them to color match the paint she used for her walls.
I painted the canvas Plum Burst. Then I chose to paint a stencil on the canvas in the corners. I got this Martha Stuart Stencil with three designs on it for $2 at Home Depot.
I also made a matching bow hanger. I had a wooden plaque, I painted it Plum burst as well then I stenciled it.
See how pretty....


Now after the canvas and plaque are dry you need to add the ribbons. I chose brown. For the canvas you will start with one going from one point to the other. Then put two on either side. Now do the same to the other side so they over lap. This is where your staple gun comes in. You will be stapling the ribbon to the backside of the canvas ON the frame. I used 3/8 inch ribbon for the french memo board.
For the bow hanger I chose to cut the strips of ribbon. Staple them evenly apart on the back side of your plaque. I used 7/8 inch ribbon for the bow hanger.
Remember to heat seal the ends of your ribbons :-)


Now we are done with the bow hanger. You can add hangers to the back. We still need to finish your beautiful memo board!
Get your glue gun and pick 5 buttons of your choice. I chose different sizes of brown ones. Hot glue these to the ribbon in the 5 cross points seen below.


Here is the Painted Memo board and the bow hanger. Next I will show you how to make a FABRIC memo board! TOO TOO CUTE!!!

Amici Bello is back FULL TIME
Hello out there!! Well it's been awhile. Working full time, planning a wedding and trying to keep up on my crafting was a little bit to hectic to also keep up with my blog. BUT now I'm HOME!!! So Planning our April wedding, crafting and being MAMMA is number one priority.
So today I'm going to post two tutorials. One on how to make a French Memo board on Canvas and one how to make one on a bulletin board with fabric.
Stay tuned for how my first sewing class goes on Wednesday :-).
So today I'm going to post two tutorials. One on how to make a French Memo board on Canvas and one how to make one on a bulletin board with fabric.
Stay tuned for how my first sewing class goes on Wednesday :-).
Subscribe to:
Comments (Atom)