What I did was SUPER simple. If you wanted to...if you have time you could order actual cards from Vista Print. But I just thought of this idea so I'll just make them with what I have. I simply pulled up my Excel pasted a picture of my daughter then underneath wrote
(picture)
Keep in touch over the summer.
XOXO,
child's name
phone number
parents email
And then I picked out a font and printed it on pink card stick. Super easy and quick. I'll cut them out and she can hand them out tomorrow to her girlfriends! Now
XOXO
Jess

Tuesday, May 22, 2012
Monday, May 21, 2012
New Mod Podge art work
Wanted to share two new mod podge pieces I made. I got a wooden picture frame at Walmart for a few dollars. First I wanted to try out this new "Crackle" paint by Martha Stuart. So I painted the sides yellow then after it dried I painted the white crackle paint over it. I then took two different pieces of coordinating paper to make this lovely piece.
I also did a letter A. After mod podging the letter I added a strip of coordinating purple lace to the back so it poked out just right under the bottom :-)


I also did a letter A. After mod podging the letter I added a strip of coordinating purple lace to the back so it poked out just right under the bottom :-)


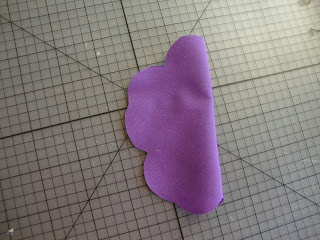
How to make a Doll dress with matching purse for beginners
Hey hey hey there! So my journey with sewing has BEGUN! LOL . Taught myself how to use my new fancy Brother Project runway Sewing Machine and now I'm ready to get busy. Today I made a doll dress. Remember this is my very first time too so stayed tuned and learn with me!
Now this dress I really did start off with a tutorial from YouTube but like most all of my projects I quickly veer-off into my own idea.
Supplies:
Fabric of your choice, at least a quarter to work with
Thread
stick pins
Sewing machine
needle
Coordinating ribbon
Any other coordinating extra's you want to add on.
Iron
Got ahead and turn on your iron so it's getting hot. Now I cut a square that was 10x20. You can make it shorter if you want. I'm measuring it to fit an Our Generation doll. Which is about the same size as a American Doll. Now the width wise will give you extra so you can either measure around your doll and cut or use my measurements and you can use the left over for a cute purse like I did! :-).
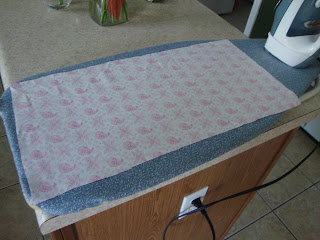

Now you need to iron your seems down. Put your fabric wrong side up and fold in your fabric on both of the longer sides. I folded twice to make it look a little nicer and iron down flat. Then put your pins in to hold your fold in place.


Time to sew baby! Leave your regular setting on your machine, nothing needs to be changed. You can use a simple straight stitch. Sew the top fold, cut your thread. Then place your fabric back on your machine and sew the bottom fold.

 OK now here is where I decided to add a little "extra". I am still getting this "dew in a straight line" thing down so in order to cover up my little "learning curves" LOL I added a strip of lace. So I pinned my lace where I wanted it then it was back to the sewing machine. And you can see Emily waiting for her dress to be finished ;-).


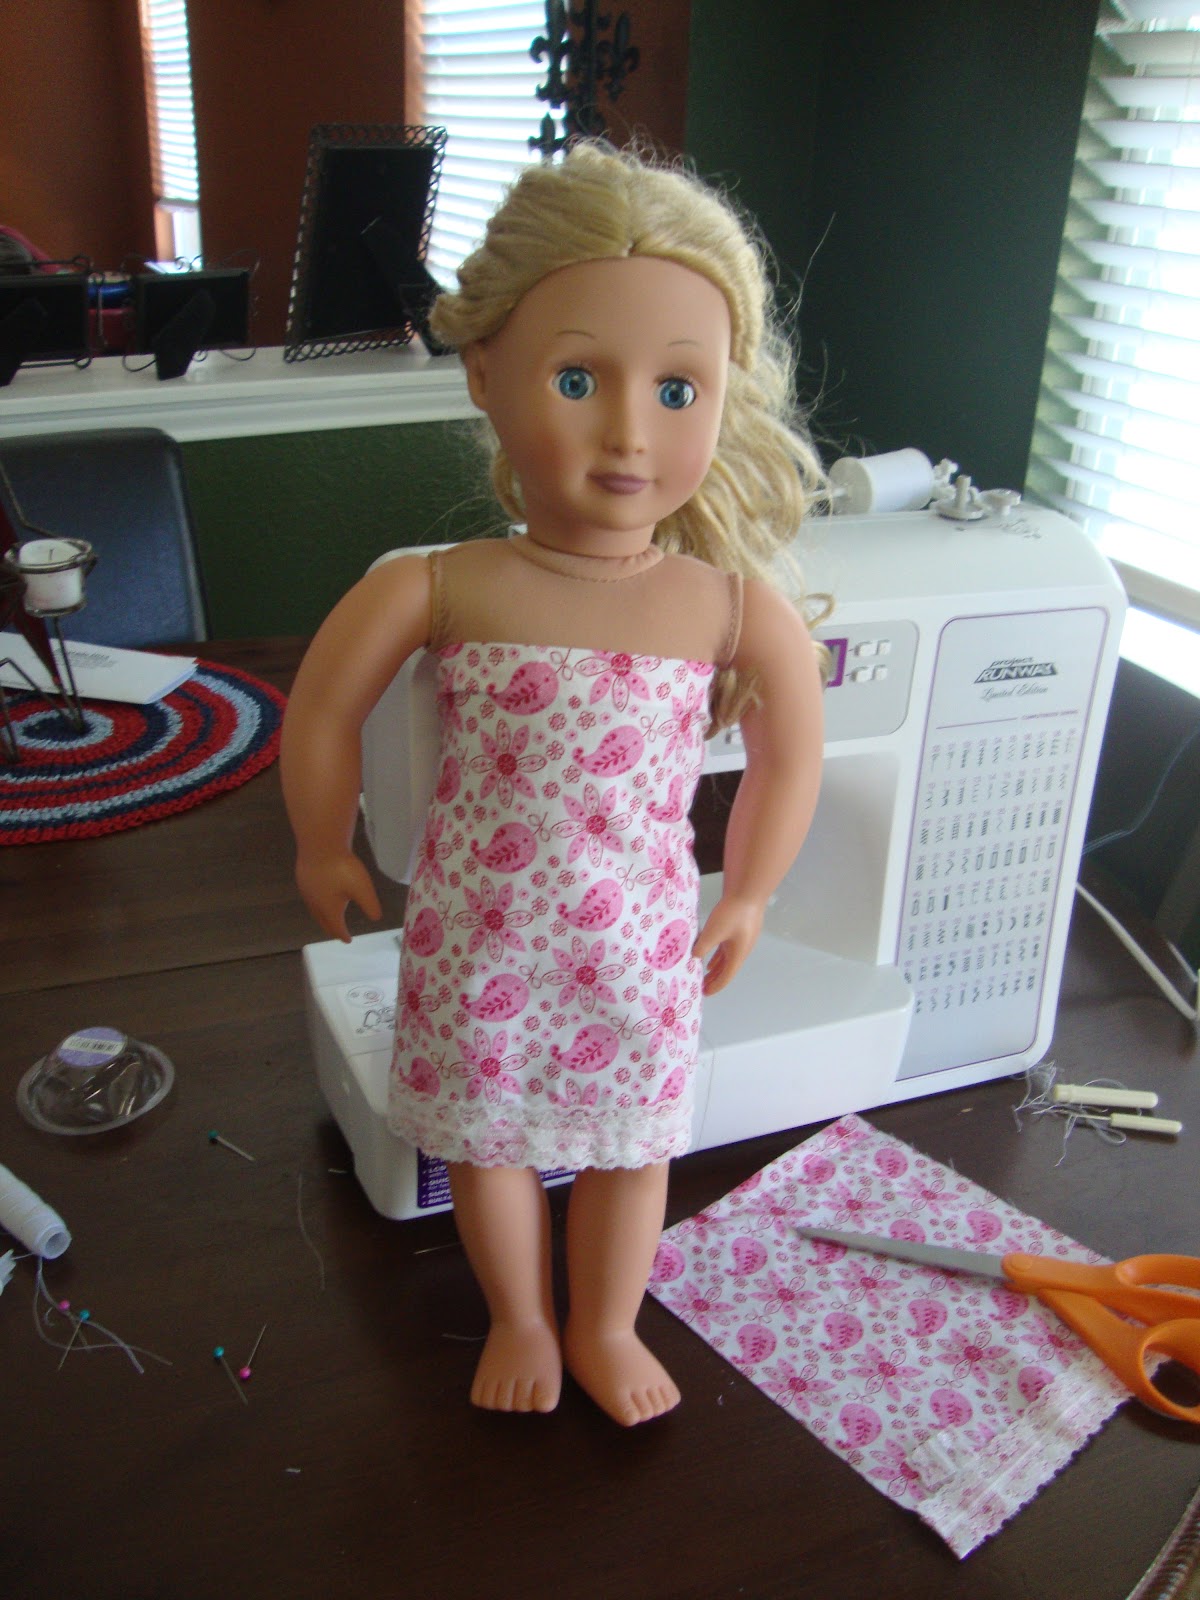
Place your fabric around your doll and put a pin where you want to sew your dress together. Make sure it's not too tight so your little one can slip it off and on. You will need to turn your fabric wrong side out and begin to sew your seem. Again very simple straight stitch is all that is needed. Once you sew your seem then cut off the excess fabric and put it to the side. Grab your ribbon you want to use for your dress straps, your needle and thread. I chose to sew the straps on by hand since it's such small ribbon I'm using.


 I put the dress back on Miss Emily and put pins where I wanted my straps to be. Slipped it off of her and hand stitched the ribbon. Try to stitch along your seem line so you can't see the extra thread. Now put your cute new dress back on your doll and tie her straps WA-LA!


 Here's what I did with my scrap piece. I folded it over to be an even line, letting y lace stick out a little for the front of the purse. Then I folded in my sides and ironed flat and pinned. It should look like a little pouch. Turn it wrong side out and sew the sides. Then I again hand stitched the ribbon to each side for the strap. So now Emily doll has a cute bag to match her cute dress! My princess will be so surprised when she gets home! Who wants to bet she asks me to make HER a matching dress and bag LOL!
XOXO,
Jess
Now this dress I really did start off with a tutorial from YouTube but like most all of my projects I quickly veer-off into my own idea.
Supplies:
Fabric of your choice, at least a quarter to work with
Thread
stick pins
Sewing machine
needle
Coordinating ribbon
Any other coordinating extra's you want to add on.
Iron
Got ahead and turn on your iron so it's getting hot. Now I cut a square that was 10x20. You can make it shorter if you want. I'm measuring it to fit an Our Generation doll. Which is about the same size as a American Doll. Now the width wise will give you extra so you can either measure around your doll and cut or use my measurements and you can use the left over for a cute purse like I did! :-).


Now you need to iron your seems down. Put your fabric wrong side up and fold in your fabric on both of the longer sides. I folded twice to make it look a little nicer and iron down flat. Then put your pins in to hold your fold in place.


Time to sew baby! Leave your regular setting on your machine, nothing needs to be changed. You can use a simple straight stitch. Sew the top fold, cut your thread. Then place your fabric back on your machine and sew the bottom fold.


Place your fabric around your doll and put a pin where you want to sew your dress together. Make sure it's not too tight so your little one can slip it off and on. You will need to turn your fabric wrong side out and begin to sew your seem. Again very simple straight stitch is all that is needed. Once you sew your seem then cut off the excess fabric and put it to the side. Grab your ribbon you want to use for your dress straps, your needle and thread. I chose to sew the straps on by hand since it's such small ribbon I'm using.


XOXO,
Jess
Wednesday, May 16, 2012
4th of July DIY Wreath!
Goooood morning! Can you believe it it's almost SUMMER! School will be out soon so I figured I better get some crafting in before I have a kiddo taking over my computer and all my crafting supplies LOL! Today I Finished my 4th of July wreath. I only bought the wreath a few weeks back and a little decoration for under $2 at Hobby Lobby. BTW Hobby Lobby is the best place to buy your wreaths. The stick one I used today I got in the floral section. The foam ones that I wrap I find in the crafting section by the paper supplies and wood painting supplies. The rest is some antique lace ribbon I found for a few cents at a 2nd hand store last summer in Port A (yes I love going to resale stores ALL over LOL even on vacation!) and then I used a "flag" printed ribbon. You also need your glue gun!


As you can see I made a big bow with tails to put up top. Then around the wreath I randomly placed rose bud flowers I made with the lace ribbon all over. I also used what I had laft of the lace and added it to the back of my bow. Now the "Liberty" decoration had a wire to hang it. I used my wire cutters and snipped it out and the loop hooks. The wire had a small star on it. I snipped it off and put it in the center of my bow. Then I glued the "Liberty" sign to the bottom of my wreath. And WAL-LA! Now I just need to go buy a wreath hanger for my door because I have NO clue where mine is.....hmmmmm maybe under my giant pile I have over here and crafts and coupons HA! ;-)
Hope you like it! Get inspired and make your own Summer wreath and share it with me. I am thinking a wreath wrapped in yarn with sea shells is in my near future!
I will make another big bow with tails soon and put up the tutorial for everyone.


Tuesday, May 15, 2012
Inflammation: The Not-So-Secret Killer
Good morning! Today I want to share about a company I have become familiar with. It's called Trivita. It's a Health and Wellness company. We have all tried several "Fad" products for losing weight, pain, energy ect. but I have to say the products from this company are by far the best. I want to share from their website an article about Inflammation. If your like me I'm always hunched over crafting which makes my back ache horribly. Well on top of that I still have back problems from giving birth SEVEN years ago LOL! I've started taking Nopalea which was created by Trivita and so far I love the taste, I'm hooked. I'll give you an update in a few weeks on my back inflammation. Better catch up! I'll be crafting like a Tasmanian devil soon when I'm back pain free ;-)
Inflammation: The Not-So-Secret Killer
How to reduce inflammation naturally
Though anti-inflammatory medications are widely available, they each come with their own set of risks and potential side effects. So how can we help reduce inflammation naturally? The answer is simple, though implementing it can take willpower and determination: lifestyle changes.
Though they may sound like a familiar litany of “remedies,” a balanced, nutritious diet, exercise and stress reduction can all go a long way toward reducing inflammation in the body.
Inflammation: The Not-So-Secret Killer


by Heather Giedt
Once considered a “secret” killer because its role in major disease went undetected, persistent (chronic) inflammation is increasingly being blamed for a host of illnesses, including arthritis, Alzheimer’s, diabetes, heart disease, stroke, depression and even cancer.
Not all inflammation is bad, however. We need inflammation to help fight germs and heal wounds. Most times, inflammation takes care of an injury and recedes. But when inflammation gets stuck in the “on” mode, trouble can follow.
Medical leaders have known for years that inflammation naturally plays a key role in inflammatory ills like rheumatoid arthritis, asthma, multiple sclerosis and inflammatory bowel diseases. But over the past decade or so, they’ve found that impact of chronic inflammation on the body is widespread.
As evidence builds about the role of inflammation in other, seemingly unrelated diseases, Harvard Cardiologist Paul Ridker, M.D., Ph.D., calls the development “a fundamental revolution in how we understand what causes heart attacks, strokes and diabetes.” He also says it opens up new ways to predict, prevent and even treat diseases.
So what can cause this killer inflammation – and more importantly, how can we stop or reduce it?
Inflammation triggers
Chronic inflammation has many triggers; luckily, we can modify our lifestyles to reduce and even eliminate some of them.
- Fat – No one likes to see it in the mirror, but it’s more than a cosmetic problem. Once suspected to be storage units of energy, fat cells are now known to churn out proteins called cytokines which fan the inflammatory process. Excess belly fat in particular can be a huge source of inflammation.
Experts believe this may explain the link between obesity and Type 2 diabetes. Obesity produces inflammation, and inflammation promotes insulin resistance, a hallmark of diabetes and metabolic syndrome (a group of symptoms which can increase the risk of diabetes, heart disease and stroke). - High-fat and high-calorie meals – Fast food and other unhealthy fare can be triggers for inflammation. Researchers from the University at Buffalo, State University of New York found that after a 900-calorie fast-food breakfast, study participants showed high blood levels of inflammation for the next four hours.
- Emotional stress – Hormones produced as part of the stress response – such as cortisol and adrenaline – can lead to inflammation. Plus, cortisol can lead to belly fat, which produces inflammation of its own.
How to reduce inflammation naturally
Though anti-inflammatory medications are widely available, they each come with their own set of risks and potential side effects. So how can we help reduce inflammation naturally? The answer is simple, though implementing it can take willpower and determination: lifestyle changes.
Though they may sound like a familiar litany of “remedies,” a balanced, nutritious diet, exercise and stress reduction can all go a long way toward reducing inflammation in the body.
- Anti-inflammatory diet – Just as certain chemicals are pro- or anti-inflammatory, so too are certain foods. You’ll want to load up on anti-inflammatory foods like colorful fruits and vegetables, particularly cruciferous vegetables such as broccoli, cabbage, Brussels sprouts, kale and cauliflower. Research shows that compounds in these vegetables decrease the production of inflammatory cytokines.
Also include legumes, nuts, healthy fats such as olive oil, and fish in your diet. The Omega-3 fatty acids in coldwater fish such as salmon, mackerel and sardines provide your body with the building blocks it needs to make anti-inflammatory hormones.
Whole grains should also be a staple in your diet: a study of overweight people found that those who ate whole grains versus refined grains such as white bread, pasta and rice, reduced their blood levels of C-Reactive protein (a marker of inflammation) by 30%.
Spices such as curry and ginger have anti-inflammatory properties, as do green, white and oolong varieties of tea. Avoid processed and junk foods, saturated fat and trans fats, all of which can be pro-inflammatory. - Activity – The benefits of exercise have been well-documented and now include reducing inflammation. After you exercise, your body creates more free radicals. Then, your body makes and uses more antioxidants, which ultimately works to reduce inflammation. Plus, fat cells are inflammation-making machines, so losing weight can reduce this source of inflammation.
Try to get at least 30 minutes of exercise most days of the week. However, don’t overdo it: exercise regimens over 60 minutes long can actually be pro-inflammatory. - Stress management – Stress hormones contribute to the “fire” of inflammation – and can contribute to belly fat. Practice stress reduction techniques such as deep breathing, meditation, yoga and massage to help bring stress under control. (Kill two birds with one stone by exercising: it’s a great stress buster!) Also be sure to get plenty of sleep each night, as lack of sleep can put stress on the body.
Thursday, May 10, 2012
Mod Podge cut out letters and shapes
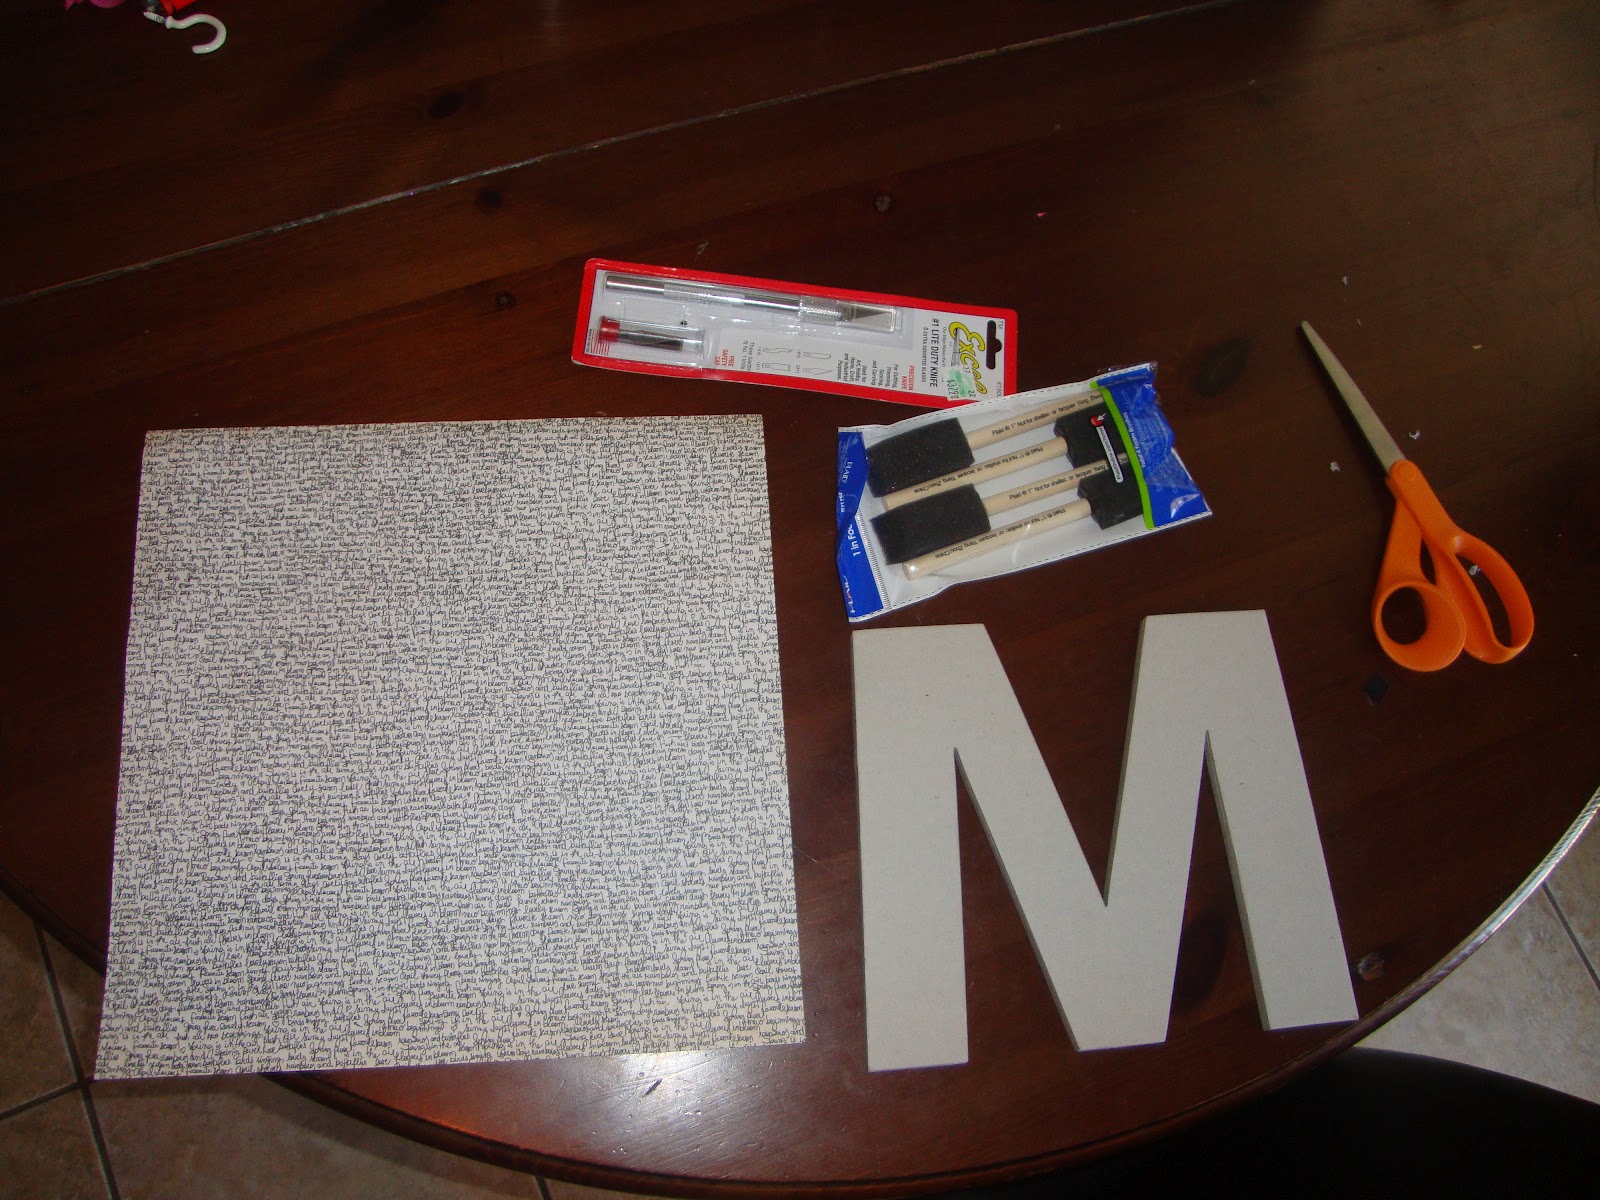
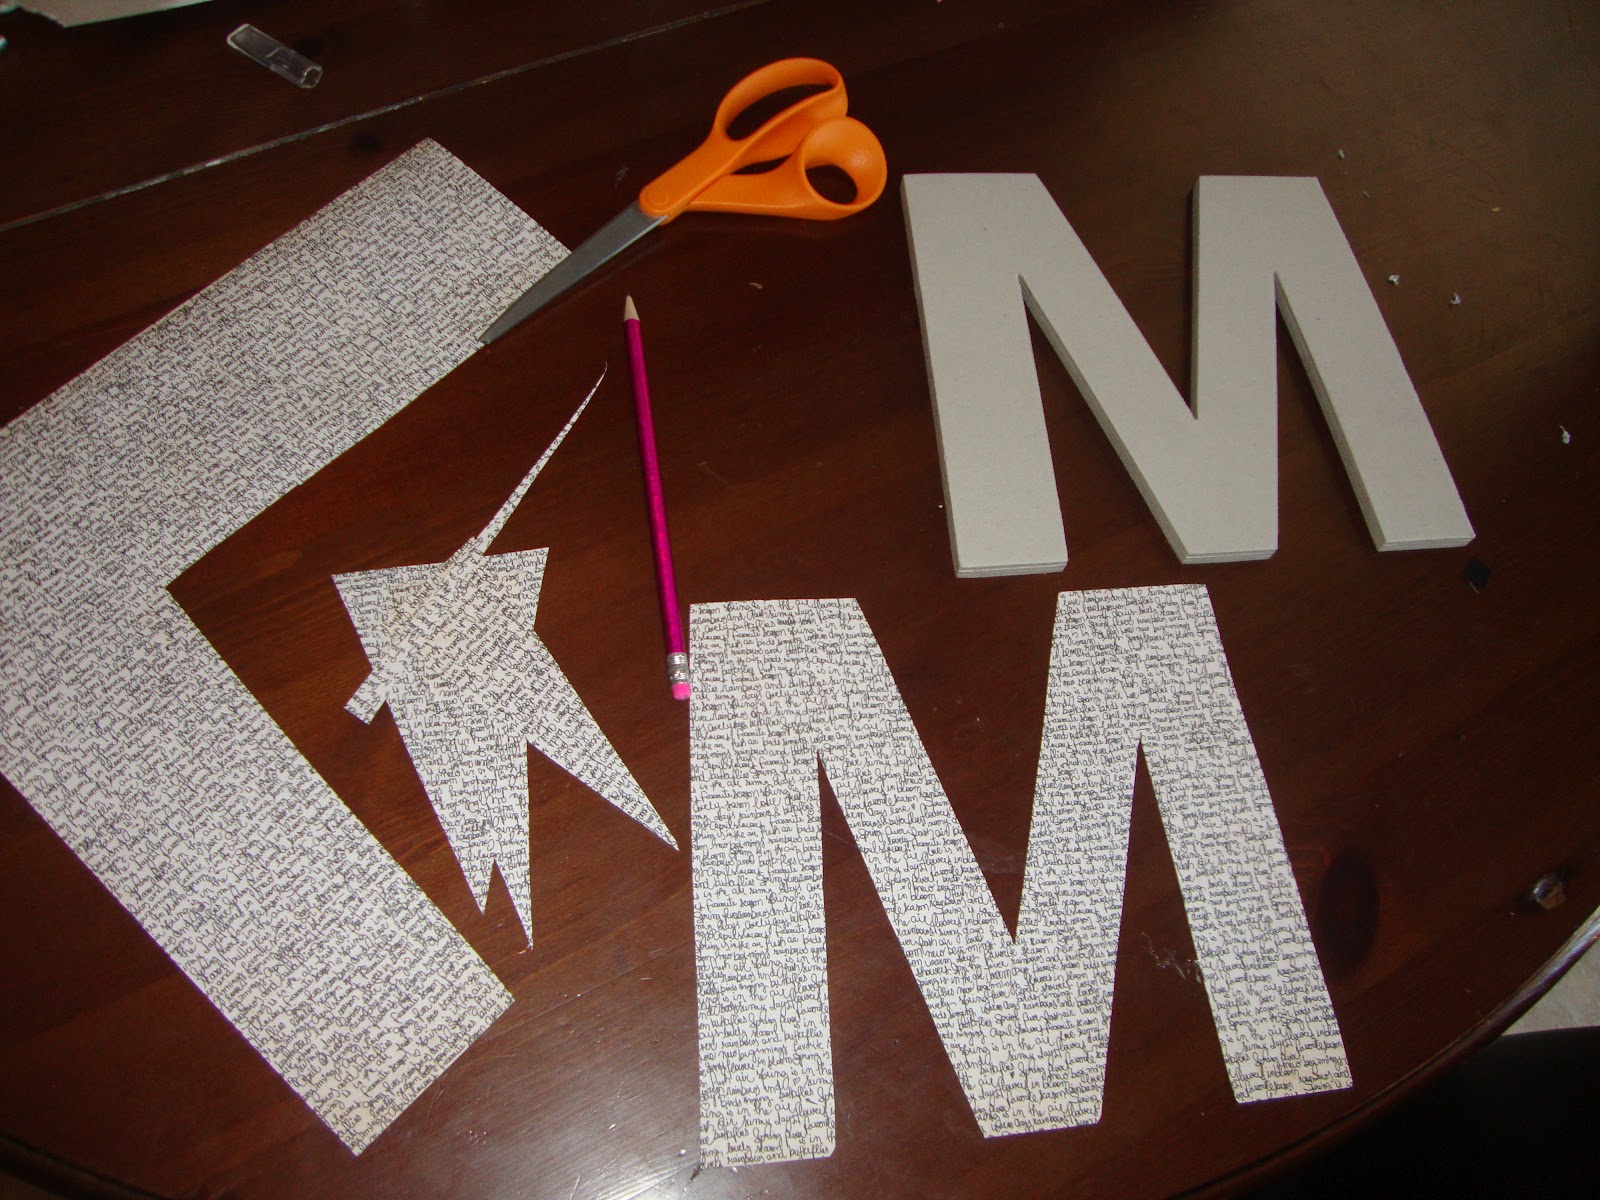
Looking for your initial to put up as a decoration? Or maybe you want to put your child's name on their wall for a decoration but you can't find the right color or design that you picture? Well here is the perfect solution! And cheap too! Go to your craft store and find the isle with all the pre cut out wood and cardboard letters and shapes. They usually fun around $2.99 but you can normally find them 50% off or take a coupon with you. I usually pay a little over a $1 for mine. Then mosey on over to the scrap book section or rummage through your own paper selection at home to find that perfect color or design. Now you need a jar Mod Podge and a sponge. I like to use the ones with a stick on the end. You can usually get a pack of 4 for under $5. Turn your paper over to the back side and trace out your letter or shape. Cut it out, try to cut inside the line you made. It's better to be a tiny bit smaller then to have the paper hanging over. Once you have cut out your paper it's time to MOD PODGE! Take your sponge and put a layer of Mod Podge on your wood or cardboard cut out. Then place your paper over it carefully and smooth it out. Look for bubbles in your paper. The Mod Podge dries quickly and you have a new DIY decoration that was cheap and easy! You can also add extra "trimmings" to your Mod Podge art! Some buttons, lace, bling ANYTHING! ;-)


Here are some examples of my Mod Podge art for my home and for gifts.


Here are some examples of my Mod Podge art for my home and for gifts.


Teacher Appreciation Wreath
Teacher Appreciation Week! This is the wreath I made this week for my daughter's teacher. I used a bunch of flowers from the fabric flower tutorial I showed you. I didn't take step by step photos of this one but it was easy and fun!
First I went to the craft store and collected what I wanted. I went in with one idea and came out with a completely NEW idea!
I used a large foam wreath and wrapped it with 3 1/2 rolls of red ribbon. Then I made a TON of fabric flowers LOL. I've never made that many in a row. I used a cute Crayon print fabric. I painted an A B C and added those, I added a mini chalkboard and a wooden ruler. Then to hang the wreath I used a cute ruler print ribbon.
The gift was a hit! I also made her teacher an fabric flower hair clip from the crayon print fabric ;-).

Finished wreath! So cute!

XOXO,
Jess
Fabric Flower
Hey everyone,
I tried a new Fabric flower! You can use fabric from around the house or even cut up an old tshirt!!! How bout this idea I found an old "vintage" pillow case. I'm SO going to cut it up and use! These flowers are perfect. I've tried several other fabric flower tutorials and this one seems to pop the best. I made this beautiful flower extra large. Here is the template I used that has several different flower sizes. This flower was made with the largest flower but the perfect size for decorating wreaths and for bows is the 3rd largest one in the group.
 Supplies:
Flower template
Fabric pin/marker the color of your fabric
Stick pins
Fabric
Scissors
Felt
Glue gun
Glue
OK select your fabric and cut out your template on a piece of paper. Now pin your template to your fabric. You can either stencil your flower onto the fabric and cut it out or if your like me I just cut around the template so I don't have marks on my fabric.
 Now for the fun part. Your going to need at least 9 flowers for each flower you make. You can add more for a more "full" flower. After you have cut your flowers, at least 9 you can start folding and gluing. Go ahead and cut out a small circle from your felt to use as a base for your flower, to glue your fabric too. After you have done this pick up one flower. You will fold it in half then fold it in half again. It will look like a triangle. Glue the "point" side in on the fabric. Your going to do this 3 more times for your first layer.


 Loving how my nail polish matches my pretty fabric ;-)


I'll post some photos of a Teacher Appreciation gift I made using a smaller version of this flower.
XOXO,
Jess
I tried a new Fabric flower! You can use fabric from around the house or even cut up an old tshirt!!! How bout this idea I found an old "vintage" pillow case. I'm SO going to cut it up and use! These flowers are perfect. I've tried several other fabric flower tutorials and this one seems to pop the best. I made this beautiful flower extra large. Here is the template I used that has several different flower sizes. This flower was made with the largest flower but the perfect size for decorating wreaths and for bows is the 3rd largest one in the group.

Flower template
Fabric pin/marker the color of your fabric
Stick pins
Fabric
Scissors
Felt
Glue gun
Glue
OK select your fabric and cut out your template on a piece of paper. Now pin your template to your fabric. You can either stencil your flower onto the fabric and cut it out or if your like me I just cut around the template so I don't have marks on my fabric.


After you glue each one, put a dab of glue in each fold.
Now for your second layer, again you will use 4 flowers.This time line them up on the center of each line dividing the first layer. Message me if that isn't clear. You do not want to put the 2nd layer directly over the first. Don't forget to go through and add a dab of glue to each fold on the 2nd layer.


Now for flower number 9. Fold it just like you did the others then roll it. It's going to be your center. So roll it then add some glue to keep it together and put glue around the base and bottom. Stick it in the center of your flower then bring of the first top layers of your flower and stick it to the sides of the "center". This will make your fabric flower pop up. You can also add dabs of glue to other spots if you feel your fabric flower needs a little extra help. After your flower is perfect you can add a pin to the back of the felt or a clip of simply glue it to your craft or even a head band!


XOXO,
Jess
Subscribe to:
Comments (Atom)